
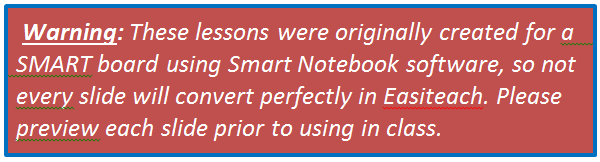
We have been getting questions about those interactive whiteboard lessons found in ThinkCentral. Some teachers have not been able to open them because they were created with SMART Notebook software. But, we have found a solution. Every teacher has RM Easiteach Next Generation software installed on his or her classroom computer, and this will open the lessons. This tutorial will explain how to make the magic happen and convert those SMART lessons into Easiteach presentations.

1) Log in to ThinkCentral (https://www-k6.thinkcentral.com)
2) Select the Grade and click on the Interactive Whiteboard Lessons button.
2) Select the Grade and click on the Interactive Whiteboard Lessons button.
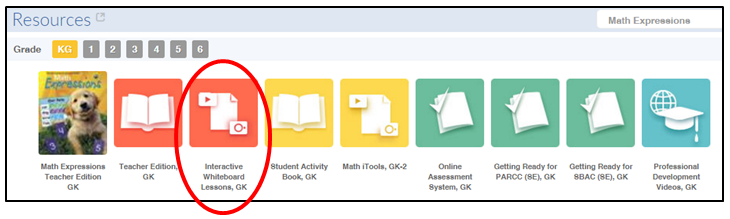
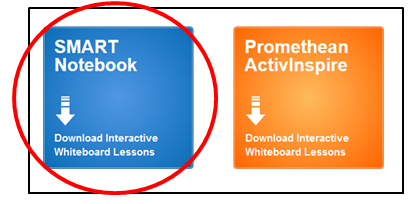
3) Click on the blue SMART Notebook icon to download the Interactive Whiteboard Lessons.
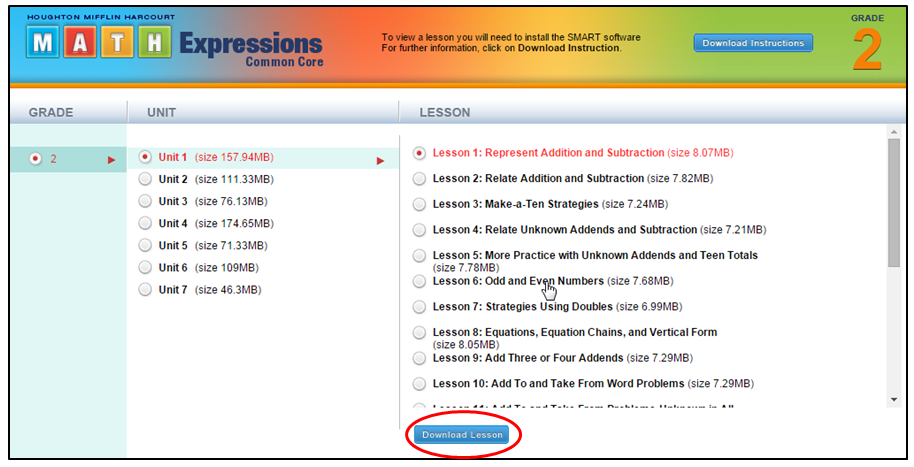
4) Click on your Grade level first (example: 2 for 2nd grade, K for Kindergarten, etc.). This brings up the Units at the right.
5) Select a Unit, which brings up the Lessons at the right. Select a Lesson number.
6) Click on the blue “Download Lesson” button toward at the bottom.
5) Select a Unit, which brings up the Lessons at the right. Select a Lesson number.
6) Click on the blue “Download Lesson” button toward at the bottom.
7) The download will show up in the bottom left corner with an arrow next to it in Google Chrome. See the example below.
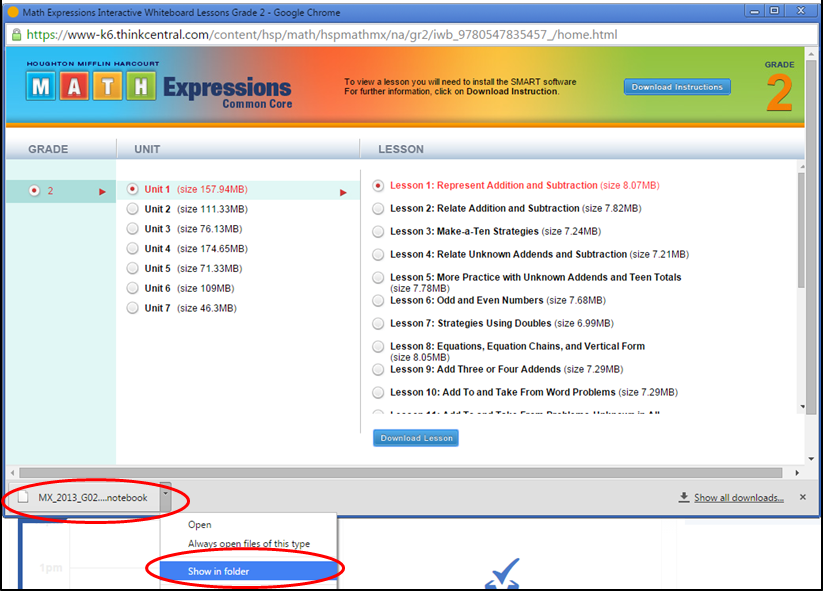
8) Click the drop-down arrow next to the download and then click Show in folder.
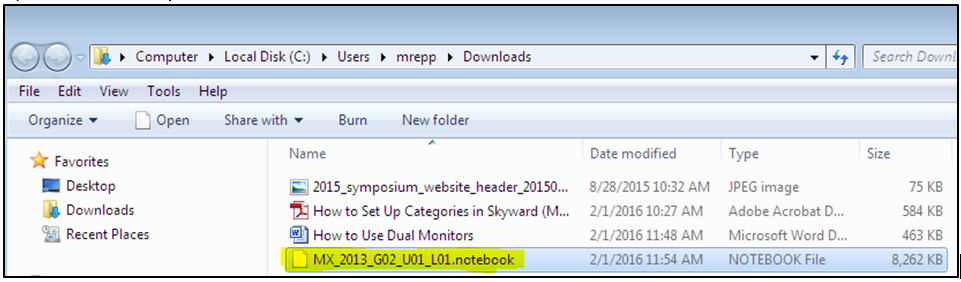
9) Notice that the downloaded file shows up in your Downloads folder and it is highlighted automatically. This is the file to open in Easiteach.
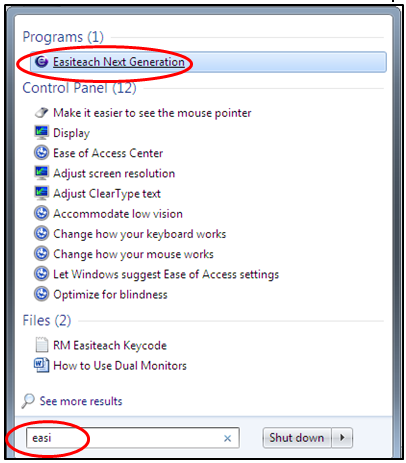
10) Open Easiteach on your computer.
Tip: The easiest way to locate Easiteach is by clicking
the Start button and then typing Easi into the
search box.
10) Open Easiteach on your computer.
Tip: The easiest way to locate Easiteach is by clicking
the Start button and then typing Easi into the
search box.
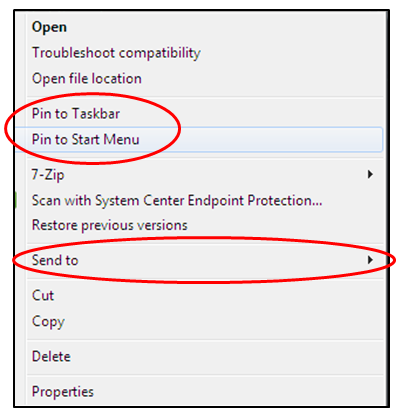
11) Now you can create a Shortcut to Easiteach
so you can get to it quickly. Right-click on Easiteach Next Generation
--Three types of shortcuts you can use include:
Pin to Taskbar, Pin to Start Menu and
Send to>>Desktop (create shortcut). Pick one.
so you can get to it quickly. Right-click on Easiteach Next Generation
--Three types of shortcuts you can use include:
Pin to Taskbar, Pin to Start Menu and
Send to>>Desktop (create shortcut). Pick one.
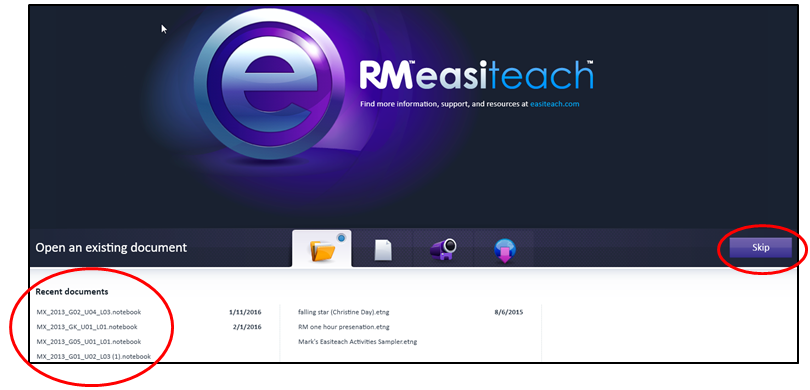
12) 1st Time Only: With Easiteach open, click on the purple Skip button at the far right.
Afterward: Notice the Recent Documents list in the lower left corner. You can use this after
lessons have been opened in Easiteach at least once.
Afterward: Notice the Recent Documents list in the lower left corner. You can use this after
lessons have been opened in Easiteach at least once.
13) Click on the e Menu in the lower left corner and then select Open.
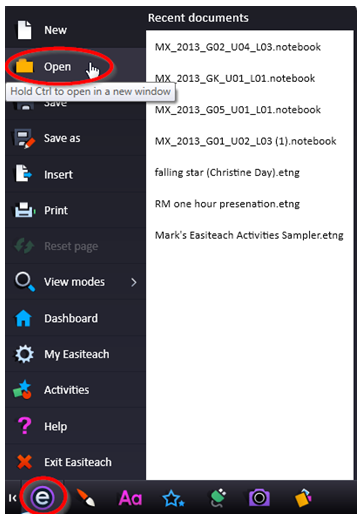
14) Locate the lesson that you want to open. The lessons are “notebook” files and will have names like MX_2013_G02_U04_L03 (always including the Unit and Lesson number. See below for an example):

15) Click on the lesson and then click Open (or) double-click the lesson. It will open in Easiteach.
16) The lesson will look like this in Easiteach. Click on the little double-arrow icon at the far left to reveal all of the pages/slides of the lesson (see below).
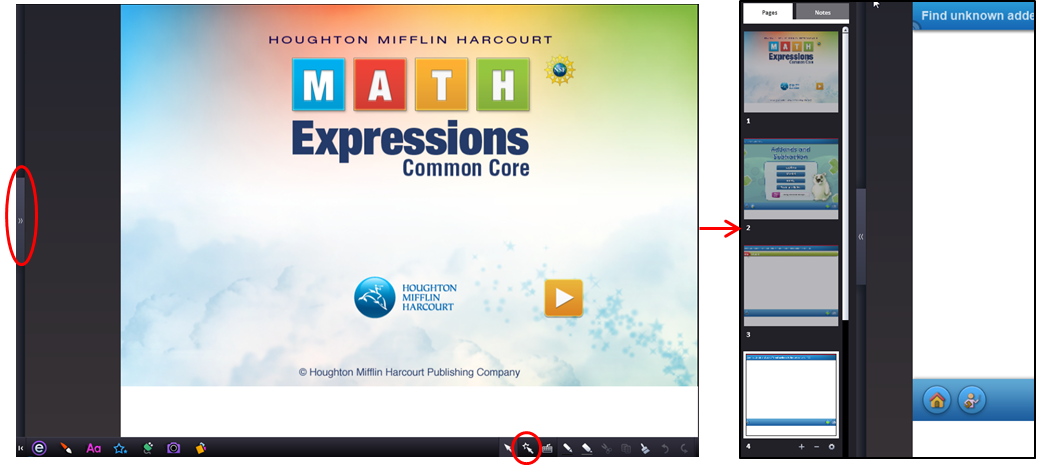
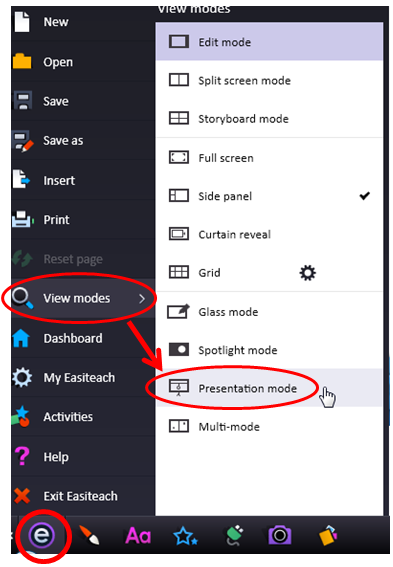
| 17) For the interactive buttons and actions to work in the lesson, there are two options: Using the Play Mode button (or) using the Presentation Mode view mode...
 |  |
We also have the Easiteach software on DVD if you want to install the application for home use. To borrow an Easiteach Install DVD, contact Mark Repp ([email protected]).
 RSS Feed
